


Proper maintenance of your motorcycle’s lights is crucial for ensuring safety on the road. Lights not only provide visibility for the rider but also allow others to see you in various conditions. Neglecting the status of your motorcycle lights can lead to dangerous situations, particularly at night or during inclement weather. Therefore, understanding how to maintain and replace your motorcycle lights is vital for all riders.
This guide aims to simplify the process of light maintenance and replacement for motorcyclists. We will cover the different types of lights commonly found on motorcycles, such as headlights, taillights, and turn signals. Additionally, we will explore common issues that can arise, signs that indicate a light needs replacing, and tips for proper upkeep to extend the lifespan of your motorcycle lighting system.
By following this comprehensive guide, you’ll not only enhance your safety but also improve the overall performance and visibility of your motorcycle. Regular inspections and timely replacements will keep your motorcycle lights in optimal condition, allowing you to ride with confidence. Let’s dive into the details of motorcycle light maintenance and discover how to keep your ride illuminated and safe!
Identifying Signs of Worn-Out Motorcycle Lights

Proper maintenance of your motorcycle includes regularly checking its lighting system. Worn-out lights can significantly affect safety and visibility on the road. Here are key signs to look for that indicate your motorcycle lights may need attention or replacement.
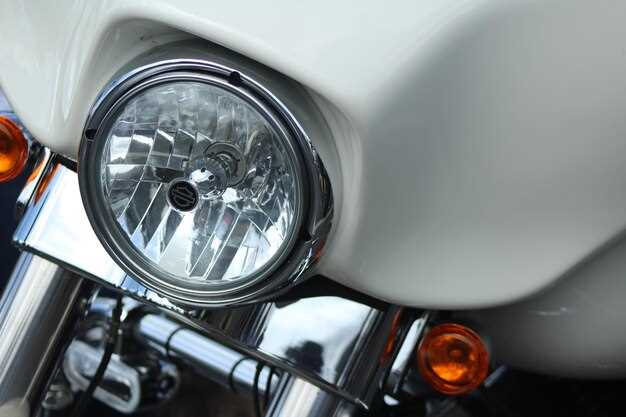
Dim or Flickering Lights: One of the most noticeable signs of worn-out lights is a decrease in brightness. If your headlights or taillights appear dim, or if they flicker intermittently, it may indicate a failing bulb or electrical issue that needs addressing.
Burnt Bulbs: Upon inspection, if you find that a bulb has a blackened or opaque appearance, it is likely burnt out. Remember to replace all bulbs on the same circuit to maintain uniformity in lighting.
Uneven Light Distribution: Worn-out headlights may produce uneven lighting patterns, causing poor visibility. This uneven distribution can be a result of aged reflective surfaces or misalignment and should be corrected immediately.
Corrosion or Physical Damage: Check for signs of corrosion or physical damage to the light assembly. Rusty sockets, cracked lenses, or broken mounting points can affect the functionality of your lights and may require complete replacement.
Increased Frequency of Bulb Replacements: If you find yourself replacing bulbs more often than usual, it could indicate an underlying issue such as electrical problems or poor quality bulbs. Regular checks and consistent maintenance can mitigate such occurrences.
Compliance with Regulations: Regular inspection is essential to ensure that all lights conform to local regulations regarding brightness and visibility. Worn-out lights may not meet these standards, posing safety risks while riding.
Timely recognition of these signs will aid in maintaining a safe riding environment. Regular maintenance checks on your motorcycle’s lighting can prevent accidents and ensure that you remain visible to other road users.
Step-by-Step Process for Replacing Motorcycle Bulbs
Replacing motorcycle lights is crucial for safety and visibility on the road. Follow this step-by-step process to ensure a proper installation of new bulbs.
Step 1: Gather Necessary Tools and Materials
Before starting the replacement, gather the required tools, which typically include a screwdriver, a socket wrench, and gloves. Also, have the new light bulbs on hand that are compatible with your motorcycle model.
Step 2: Ensure Safety
Park your motorcycle on a stable surface and turn off the ignition. For added safety, disconnect the battery to prevent any electrical shorts while working on the lights.
Step 3: Access the Headlight or Tail Light Assembly
Locate the headlight or tail light assembly. Depending on your motorcycle model, you may need to remove a cover or unscrew bolts to gain access. Refer to your owner’s manual for specific instructions related to your model.
Step 4: Remove the Old Bulb
Once you have access, carefully disconnect the wiring harness from the bulb. Then, remove the old bulb by twisting it counterclockwise or pulling it straight out, depending on its design. Avoid touching the glass of the new bulb with your bare hands to prevent damage.
Step 5: Install the New Bulb
Take the new bulb and insert it into the socket. If it’s a bayonet-style bulb, twist it clockwise until it locks into place. Ensure it sits securely in the assembly before reconnecting the wiring harness.
Step 6: Test the Lights
Reconnect the battery if it was disconnected. Turn on your motorcycle to test the new lights. Check that both the headlight and tail light function correctly and adjust them if necessary.
Step 7: Reassemble the Assembly
Once you’ve confirmed that the new bulbs are working, reassemble any covers or mountings you removed earlier. Make sure everything is tightened securely to prevent vibrations from loosening components while riding.
Step 8: Dispose of Old Bulbs Properly
Dispose of the old bulbs following local regulations. Many automotive stores offer recycling programs for used bulbs, helping to reduce environmental impact.
Routine Maintenance Tips to Extend the Life of Motorcycle Lights
Regular maintenance of motorcycle lights is essential to ensure optimal performance and longevity. Start by checking the bulbs frequently for any signs of wear or burnout. Replace any dim or flickering bulbs promptly to avoid further electrical issues.
Clean the lenses of your motorcycle lights regularly to remove dirt, grime, and road debris. Use a soft microfiber cloth and a suitable cleaning solution to prevent scratching the surface, which can reduce brightness. Ensure that the lights are functioning properly after cleaning, as dirt buildup can obstruct light output.
Inspect the wiring and connectors for signs of corrosion or damage. Corroded connections can hinder power flow and lead to failure. Use a contact cleaner to maintain good electrical connections, ensuring that the connectors are securely attached to avoid intermittent lighting issues.
Check the alignment of headlights regularly. Properly aligned lights provide better visibility on the road and ensure that light is directed where it is needed most. If your lights are misaligned, adjust them according to the manufacturer’s specifications.
Consider upgrading to LED lights when replacing old bulbs. LEDs have a longer lifespan and are more energy-efficient, reducing the frequency of maintenance needed. Additionally, they provide brighter illumination, enhancing safety during nighttime rides.
Finally, store your motorcycle in a dry, sheltered location to protect the lights from harsh weather conditions. Excess moisture and extreme temperatures can adversely affect the lifespan of your motorcycle lights. Regularly consider the environment where your motorcycle is parked, making adjustments as necessary to provide adequate protection.