


Maintaining optimal performance in your motorcycle is essential for safety, and one of the critical components to keep in check is the brakes. Over time, air can enter the brake lines, leading to a spongy or ineffective brake feel, which can severely compromise your riding experience. To ensure your motorcycle’s braking system functions correctly, it is vital to perform a proper brake bleed.
Bleeding motorcycle brakes might seem daunting for those who are not mechanically inclined, but with the right tools and a systematic approach, it can be done effectively. This process involves removing any trapped air from the brake lines and replacing old brake fluid, ensuring that your motorcycle’s braking system remains responsive and safe. Understanding the correct steps to bleed your motorcycle brakes will not only enhance your riding confidence but also prolong the lifespan of your braking components.
In this guide, we will outline the essential steps for bleeding motorcycle brakes, considering various motorcycle types and brake systems. Whether you are a seasoned rider or a beginner, following these procedures will help you maintain the integrity of your motorcycle’s braking system and ensure a safer ride on the road.
Understanding Brake Fluid Types and Their Importance
When it comes to motorcycle brakes, the type of brake fluid used is crucial for performance and safety. There are two primary types of brake fluids: DOT 3 and DOT 4, both of which are glycol-based. Additionally, DOT 5 is a silicone-based fluid that is also commonly discussed in the motorcycle community.
DOT 3 and DOT 4 fluids are hygroscopic, meaning they absorb moisture from the air. This absorption can lead to a decrease in boiling points, which can affect the braking efficiency, particularly under high-stress conditions. For motorcycles, consistent brake performance is vital, as reduced boiling points can lead to brake fade and compromised stopping power. It’s essential to regularly check and replace brake fluid to maintain optimal performance.
DOT 5 fluid, on the other hand, does not absorb moisture, which might seem like an advantage. However, it is not compatible with systems designed for glycol-based fluids, and using it incorrectly can lead to significant problems, including brake failure. Therefore, selecting the correct type of brake fluid is crucial for maintaining the integrity of motorcycle brakes.
Another important aspect to consider is the flash point and the boiling point of the brake fluid. The flash point indicates the temperature at which the fluid can ignite, while the boiling point indicates the temperature at which the fluid vaporizes. Both of these factors influence the safety and reliability of the braking system. Regularly checking the fluid and ensuring its quality and type are essential steps in maintaining motorcycle brakes.
In conclusion, understanding brake fluid types and their properties is vital for any motorcycle owner. It ensures that brakes function effectively, providing safety and confidence while riding. Regular inspection and maintenance of the brake fluid contribute significantly to the longevity and reliability of the motorcycle braking system.
Step-by-Step Guide to Bleeding Your Motorcycle Brakes
Bleeding your motorcycle brakes is an essential maintenance task that ensures optimal performance and safety. Follow these clear steps to successfully bleed your motorcycle brakes.
1. Gather Your Tools: Start by collecting all necessary tools and materials, including a wrench, brake fluid, a clear hose, and a brake bleeder container. It’s crucial to use the correct type of brake fluid specified for your motorcycle.
2. Prepare the Motorcycle: Place your motorcycle on a level surface and secure it using a stand if necessary. This will keep it stable during the bleeding process. Make sure to wear safety gloves and goggles to protect yourself from brake fluid.
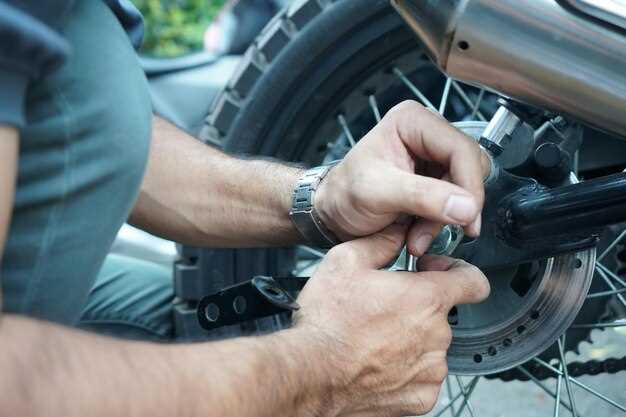
3. Locate the Brake Bleeder Valve: Identify the brake bleeder valve on the caliper of the brake you want to bleed. This is usually a small screw or valve that can be accessed easily.
4. Attach the Hose: Connect one end of the clear hose to the brake bleeder valve and place the other end into a clean container to collect old brake fluid. This setup will prevent any spills and help you see the fluid’s condition during bleeding.
5. Check Brake Fluid Level: Before starting, check the brake fluid reservoir to ensure that it is filled to the appropriate level. If it’s low, top it up with fresh brake fluid to avoid introducing air into the system.
6. Open the Bleeder Valve: Using the wrench, slowly twist the bleeder valve counterclockwise to open it. Be cautious not to open it too much; a quarter turn is usually sufficient.
7. Pump the Brake Lever: With the bleeder valve open, pump the brake lever several times until you feel increased resistance. This action will push the old fluid and air out of the system through the hose.
8. Watch for Bubbles: Observe the clear hose connected to the bleeder valve. If you see bubbles, this indicates that air is being released from the brake line. Continue pumping until you see a steady stream of fluid without bubbles.
9. Close the Bleeder Valve: Once you achieve a steady stream of fluid, close the bleeder valve by turning it clockwise securely. This prevents air from entering the system again.
10. Repeat if Necessary: You may need to repeat the process several times, especially if the brakes feel spongy. Check the fluid level in the reservoir frequently and keep it topped off during the process.
11. Test the Brakes: After bleeding both front and rear brakes, test the brake lever to ensure it feels firm. If it still feels soft, consider repeating the bleeding process or consulting a professional.
12. Dispose of Old Fluid: Properly dispose of the old brake fluid collected in the container. Do not pour it down the drain, as it is harmful to the environment.
Following these steps will help you effectively bleed your motorcycle brakes, ensuring they function correctly and contribute to your safety on the road.
Troubleshooting Common Brake Bleeding Issues
During the brake bleeding process, several common issues may arise that can hinder effective brake performance. Identifying and addressing these problems early ensures optimal functionality and safety. One frequent issue is the presence of air bubbles trapped in the brake line. If the brakes feel spongy or unresponsive after bleeding, it is likely that air remains within the system. To resolve this, repeat the bleeding process, ensuring that the brake lever is fully depressed and held while you open the bleeder valve.
Another common problem is fluid contamination. Using the wrong type of brake fluid, or mixing different fluids, can lead to brake failure. Verify that you are using the correct fluid as specified by your motorcycle manufacturer. If you suspect contamination, completely flush the brake system and replace it with the appropriate fluid.
Leaking brake fluid can also create issues during bleeding. Inspect all brake lines, calipers, and connections for any signs of leakage. Tighten any loose fittings or replace any damaged components to maintain proper pressure in the system.
Inconsistent pedal feel can indicate a malfunctioning master cylinder. If bleeding the brakes does not resolve the issue, consider checking the master cylinder for damage or wear. In some cases, it may be necessary to rebuild or replace it to restore proper brake function.
Lastly, ensure that you are bleeding the brakes in the correct sequence, especially if your motorcycle has multiple calipers. Following the manufacturer’s recommended order is crucial for removing air effectively from the system. Addressing these common issues will help you achieve a successful brake bleeding, enhancing both performance and safety.