


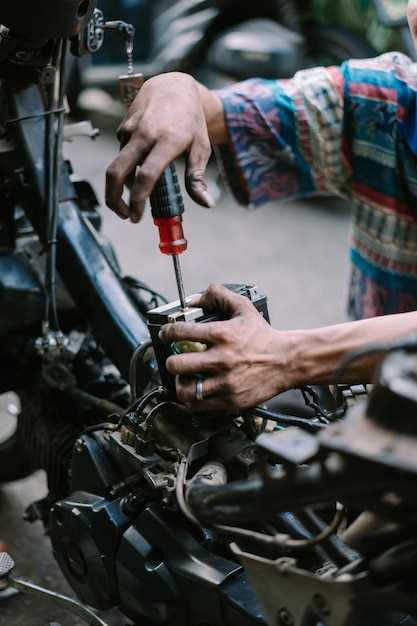
Understanding the electrical system of your motorcycle is crucial for effective repair and maintenance. Many motorcycle problems can originate from faulty wiring, a dead battery, or malfunctioning components, making it essential for riders to familiarize themselves with the basic principles of electrical diagnostics. By mastering these concepts, you can not only save time and money but also ensure a safer riding experience.
Each motorcycle is equipped with a complex network of electrical parts that power essential functions like lighting, ignition, and instruments. When issues arise, identifying the root cause can seem daunting. However, with a systematic approach, diagnosing electrical problems becomes significantly easier. This article will provide you with practical tips and techniques to troubleshoot and resolve common electrical issues, empowering you to take control of your motorcycle’s maintenance.
In the following sections, we will explore essential tools for electrical diagnosis, explain how to interpret symptoms, and guide you through step-by-step procedures for common issues. Whether you are an experienced mechanic or a novice rider, the knowledge gained here will be invaluable, ensuring your motorcycle runs smoothly and efficiently.
Identifying Common Electrical Issues in Motorcycles
Motorcycles, while being powerful machines, can face a range of electrical problems that may hinder their performance. Identifying these issues promptly can save time and expenses during repair. Here are some common electrical problems that motorcycle owners might encounter:
- Dead Battery
A dead or weak battery is a prevalent issue. It may result from prolonged storage or failure in charging systems. Signs include dim lights or an engine that won’t start.
- Faulty Charging System
If the battery discharges quickly after being charged, the charging system may be malfunctioning. This can involve issues with the alternator, voltage regulator, or wiring.
- Blown Fuses
Blown fuses can disrupt the electrical flow, affecting components like lights or ignition systems. Checking and replacing fuses is a straightforward repair task.
- Corroded Connectors
Corrosion on electrical connectors can lead to poor connections, resulting in intermittent failures or complete loss of electrical function. Regular inspections are essential.
- Short Circuits
A short circuit can occur when wires become damaged or frayed, leading to unexpected behavior of the electrical system. This may require thorough diagnostic and repair work.
- Faulty Ignition System
An inconsistent spark or failure to start may indicate issues in the ignition system, such as bad coils or faulty spark plugs.
By familiarizing yourself with these common electrical issues, you can enhance your understanding of motorcycle repair. Regular checks can contribute to a longer lifespan for your motorcycle and a more enjoyable ride.
Tools and Techniques for Testing Motorcycle Electrical Systems
When diagnosing electrical problems in motorcycles, utilizing the right tools and techniques is essential for effective repair. Here are some key instruments and methods to ensure thorough testing of electrical systems.
Multimeter: A multimeter is an indispensable tool for any motorcycle technician. It measures voltage, current, and resistance, which are crucial for identifying faulty components. When testing the battery, check the voltage under load and at rest. This will help determine if the battery is functioning properly or if it needs replacement.
Test Light: Another useful tool is the test light, which helps quickly identify the presence of voltage in various circuits. By connecting the test light to ground and probing the circuit, you can easily determine if power is reaching the components, effectively narrowing down problem areas.
Battery Load Tester: This device tests the battery’s ability to hold a charge under load. It provides a more accurate assessment of the battery’s health, as it simulates real-life working conditions. A failing battery may pass a regular voltage test but fail under load.
Wiring Diagrams: Having access to the correct wiring diagrams for your motorcycle model is crucial. These diagrams illustrate the various circuits and connections, making it easier to understand how the electrical system is structured. This knowledge allows for efficient tracking of any issues.
Continuity Tester: This tool checks if a circuit is complete and functioning properly. It can help identify broken wires or damaged connections that may lead to electrical failures. Simply attach the tester to both ends of the circuit and check for continuity.
Oscilloscope: For advanced diagnostics, an oscilloscope can provide in-depth analysis of electrical signals within the motorcycle’s systems. It helps visualize waveforms, making it easier to detect problems in components such as ignition systems and sensors.
Conductive Grease and Corrosion Cleaner: Maintaining clean and secure connections is vital for preventing electrical problems. Using conductive grease on battery terminals and connectors can enhance conductivity, while corrosion cleaner helps remove any buildup that may impede electrical flow.
By leveraging these tools and techniques, motorcycle owners and technicians can efficiently diagnose and address electrical problems. An organized approach will not only save time but also contribute to safer and more reliable motorcycle operation.
Step-by-Step Guide to Troubleshooting Wiring Problems
Diagnosing wiring issues in your motorcycle is crucial for optimal performance and safety. Follow this comprehensive guide to identify and resolve common electrical problems efficiently.
Step 1: Safety First – Before beginning any troubleshooting, ensure that the motorcycle is turned off and the battery is disconnected. This prevents accidental shocks and short circuits while you work on the wiring.
Step 2: Visual Inspection – Start with a thorough visual inspection of the wiring harness. Look for any signs of frayed wires, corrosion, burnt connectors, or loose connections. Pay special attention to areas where the wires may rub against the frame or other components.
Step 3: Check the Battery – A common source of electrical problems is a weak or dead battery. Use a multimeter to check the battery’s voltage; it should read around 12.6 volts when fully charged. If the voltage is low, recharge or replace the battery as needed.
Step 4: Test the Fuses – Inspect the fuse box for any blown fuses. Replace any that are damaged and test if the problems persist. A blown fuse often indicates a larger issue, so keep it in mind as you continue troubleshooting.
Step 5: Use a Multimeter – A multimeter is an essential tool for diagnosing wiring problems. Check for continuity in the wires, especially in areas where damage is suspected. If a wire has no continuity, it may be broken internally, requiring repair or replacement.
Step 6: Check Ground Connections – Poor grounding can lead to various electrical issues. Ensure all ground connections are clean, tight, and free of corrosion. A weak ground can cause erratic behavior in electrical components.
Step 7: Test Components Individually – If the wiring appears intact, test individual electrical components such as the starter, lights, and ignition system. Use the multimeter to ensure each component receives adequate voltage and functions correctly. Any failing component may need repair or replacement.
Step 8: Document Findings – Keep a record of any issues discovered during troubleshooting. This documentation can be helpful for future reference and can assist in diagnosing recurring problems.
Step 9: Repair and Reassemble – Once the problems are identified, conduct the necessary repairs. This may involve splicing wires, replacing connectors, or rewriting sections of the wiring harness. After repairs, carefully reassemble all components and ensure everything is securely fastened.
Step 10: Final Test – Reconnect the battery and conduct a final test to ensure all electrical systems are functioning properly. Monitor the motorcycle during a test ride to confirm the completion of the repair. If problems occur again, revisit your findings and recheck the wiring.